
MycoGlobe
PATENT PENDING
Colorado Born


Introducing MycoGlobe


MycoGlobe is a Re-usable wide-mouth jar setup, perfect for home mycology education. It's designed to grow culinary species like Pleurotus ostreatus (Oyster mushrooms) or other species of your choice. This setup is a great tool to learn about fungal life cycles and lab technique. Not for illegal use.


Adjustable Holes for Gas Exchange
CUSTOMIZABLE CONDITIONS
MycoGlobe features adjustable holes that allow you to control the gas exchange within the chamber. This means you can customize conditions to suit many different species. If too much moisture is lost, close the holes to keep the environment humid and condensation higher. A fine mist spray bottle can easily be used to replace any lost moisture.

Firstly, maintaining the right temperature is crucial; different mushroom species have specific temperature preferences for optimal growth, typically ranging from 65°F to 75°F (18°C to 24°C). Adequate humidity levels, usually around 90%, are essential to create a moist environment that promotes mycelial development and prevents drying out. Proper lighting is not usually required as mushrooms thrive in darkness, but indirect natural light or low-intensity artificial light can help establish a diurnal rhythm. Fresh air exchange is required, balancing between certain levels of carbon dioxide and oxygen. Additionally, using a suitable substrate with proper nutrition, such as sterilized and enriched organic material, supports a healthy diet.
In other words, mushrooms need oxygen and are made up of mostly water.


MASON JAR ATTACHMENT!
REGULAR & WIDE MOUTH THREAD DESIGN
LONG-LASTING AND DURABLE 3D Prints with color and material options


MycoGlobe is made from high-quality materials that are built to last. With proper care and maintenance, your MycoGlobe will provide you with years of mushroom science and research.
Fits Most Mason Jars
MycoGlobe is designed to fit most standard-sized mason jars. This means you can easily find replacement jars if needed.


EASY STEP PROCESS
To ensure the greatest chance of success, carefully read through ALL the steps before you actually start the process so everything makes more sense.

Inoculation Port

Flame Sterilize Needle
RED HOT

10 SECOND COOL
DOWN
Step 1
Locate the dark grey Inoculation Port. This is where you will inject or "Inoculate" the mushroom species of your choice.
Step 2
Carefully pull the cap and
Flame sterilize the needle with a lighter.
***UNTIL ITS RED HOT***
This should destroy all potential contaminants.
Step 3
Let the needle cool down for 10 solid seconds. Count out loud or use a stopwatch!

Insert whole needle
Step 4
Right after the 10 second "cool down" has passed, insert at least 2/3 of the needle into the (GREY) self healing injection port, followed by emptying the contents of the syringe.
REPLACE THE SYRINGE CAP AND DISCARD SAFELY AND PROPERLY

Wrap with Foil
Step 5
Choose an item like aluminum foil which can now be wrapped around the sides of the glass, to eliminate all chances of light penetrating inside the jar.

Incubate 2 weeks
Dark & Warm
Step 6
Time for Incubation!
Now place jar in a cabinet above the fridge or where the hot water heater is located. Find any area in your house that will be consistently warmer than the final fruiting location.
To Re-Cap the main "take-away" points.
Step1 Grey Inoculation Port
Step 2 Flame Sterilize Needle (Red Hot)
Step 3 10 second Cool Down
Step 4 Insert the Needle ALL the way
Step 5 Block the light with Foil
Step 6
Incubate in a warmer place than the average temp in your household & in the dark for 2 weeks. Set an Alarm on your phone as a reminder.

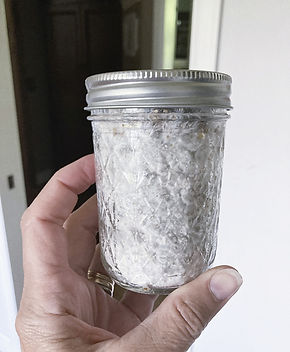
After 2 Weeks of Incubation,
Check your jar for "Colonization"
This Jar is partially colonized and looks healthy!
This Jar is FULLY COLONIZED and is ready to fruit!
This Jar could be "over colonized" with a condition called overlay
All White, Healthy Jar?
Healthy mushroom mycelium appears as a vibrant, dense, and white web-like network that radiates vitality and growth. Its texture is velvety and uniform, exhibiting a consistent and smooth surface across the substrate. Underneath this surface, the mycelium forms intricate branching structures, resembling fine threads or veins that extend to colonize the entire substrate. In the absence of contaminants, such as mold or bacteria, the mycelium maintains its pristine white coloration, indicating robust and vigorous growth. This flourishing mycelial network serves as the foundation for future mushroom development, promising a successful and bountiful harvest in the cultivation process.
Fully Colonized?
When mushroom substrate within a jar is fully colonized, it exhibits a uniform, solid white appearance, indicating that the mycelium has thoroughly permeated the substrate. There should be no visible patches of "un-colonized" substrate. The surface may appear slightly fluffy or cotton-like, and the mycelium should feel firm to the touch. At this stage, the jar is ready to transition to fruiting conditions. It's important to wait until complete colonization to ensure the mycelium is strong and established, which will contribute to a successful fruiting.


Healthy Mycelium


Contamination
Bacterial contamination often presents as slimy or discolored patches. It may appear as the colors yellow, green, or brown, and emit an unpleasant odor. Mold contamination, on the other hand, can manifest as fuzzy, cotton-like growth in various colors such as blue, green, or black. Both contaminants can disrupt the uniform white appearance of healthy mycelium. Visual Inspection, along with keen attention to changes in texture, color, and smell, is crucial for early detection. If contamination is suspected disposing of the entire jar is recommend. Certain types of contamination can be extremely dangerous to breath or human health.

FRUITING Starts after full colonization.

Mushrooms
Forming
(Pinning)
Simply open the colonized substrate jar and spray the top with water and attach the "MycoGlobe" followed by the top jar.
Now you can place this Mini Mushroom Tiny Home any where bright with INDIRECT sunlight!
**Too much air movement in the same room can create too much moisture loss. The hole adjustments on the sides of the chamber could be nearly closed to prevent to much moisture loss**
Environmental Cues
Mushrooms initiate fruiting, the process of forming the fruiting body (the mushroom itself), in response to specific environmental cues. A few ways this initiation can occur include:
-
Temperature Drop: Many mushroom species require a sudden drop in temperature to signal the start of fruiting. Mimicking the change of seasons, a temperature reduction can trigger the mycelium to shift its focus from vegetative growth to reproductive growth.
-
Humidity Fluctuation: A decrease in humidity levels can prompt the mycelium to begin producing mushrooms. This drop in humidity is a common occurrence in natural environments during drier periods.
-
Light Exposure: While most mushrooms prefer darkness during their vegetative stage, exposure to light, especially a shift from darkness to light, can stimulate fruiting in some species. This is thought to simulate the dappled light conditions that occur as a result of foliage cover in the wild.
Spraying the top of the substrate would achieve a similar effect, like in nature, rainfall helps maintain proper moisture levels in the environment which is crucial for mushroom growth. Spraying the substrate, would create localized humidity and moisture, supporting the development of the fruiting body. This process encourages the mycelium to focus its energy on forming mushrooms rather than continuing vegetative growth. Just as rain provides the needed moisture for wild mushrooms, a controlled application of water would promote a humid micro-environment, conducive to required fruiting conditions.

WHY CHOOSE MYCOGLOBE?
This is a great tool to learn about fungal life cycles and lab technique.

